When a file refuses to open, the safest first move is to protect the original copy and test a repair corrupted file workflow before you try to rebuild anything from memory. That simple habit helps separate a bad save, a sync conflict, or a transfer error from deeper file damage.

Why files become corrupted in daily work
Files usually break during ordinary work moments rather than dramatic accidents. A laptop can lose power during a save, an app can crash while writing the final version, a cloud folder can sync two edits at once, or a USB transfer can stop halfway through. The file name may still look normal, but the underlying structure is no longer reliable. In many cases the document is not fully gone; it is only missing enough structure that the app can no longer read it cleanly.
That is why file corruption is so confusing. The content often still exists in part, but the program cannot read it cleanly. In practice, the first response should be simple: stop overwriting the original, make a duplicate, and check whether a backup or version history already contains a clean copy.
That is why the most common complaints are usually the same: the image looks faded, soft, torn, scratched, or simply too weak to print, share, or archive without more work.
What should you try before starting file repair
Before you repair anything, look for an easy recovery path. Check autosave, local drafts, cloud version history, and any earlier export you may have saved. If the file still fails to open everywhere, the problem is likely in the file structure rather than the app you are using.
For a browser-based first pass, Repairit Online can quickly show whether a smaller file still has a recoverable structure without forcing a full desktop setup.
When the file is larger, more complex, or tied to a deadline, a desktop workflow is usually the better next step. You can choose Wondershare Repairit desktop version. It keeps the original file local, gives you more room to review the result, and fits better when the damaged document contains tables, attachments, or repeated revisions. That is especially useful for reports, project notes, and shared files that other people still need to edit.
Step-by-Step: Repair a Corrupted File
The process is intentionally direct: choose file repair, add the damaged file, and preview the repaired result before you trust it. That keeps the user focused on recovery instead of on technical file details.
This workflow is helpful because it reduces the risk of making the file worse. You work on a duplicate, let the tool inspect the damaged copy, and only then decide whether the recovered version is good enough to return to work. If the preview does not look right, you can stop there and try another version instead of burning time on repeated manual attempts.
For office files, the value is not only repair speed. It is also consistency. A clear sequence gives people a repeatable way to handle corrupted documents, spreadsheets, presentations, and PDFs without starting over from scratch. It also makes the handoff easier when a teammate needs to review the repaired copy after you are done.
Repair corrupted files step-by-step
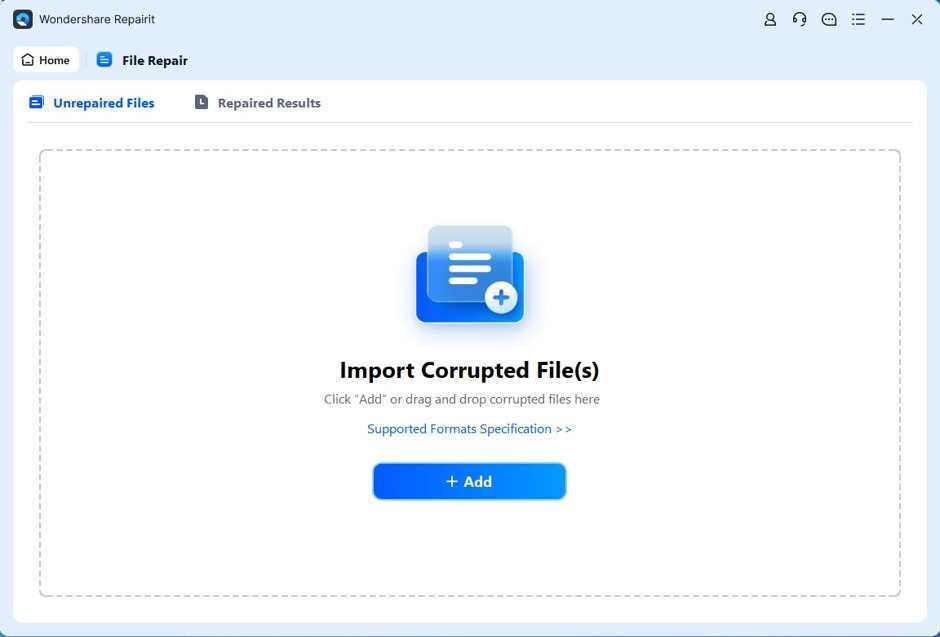
Step 1: Add a copy of the damaged file
Always work on a duplicate. Keep the original untouched so you still have a fallback if the repair result is partial or if you later find a better version in backup. This single habit prevents most recovery mistakes.
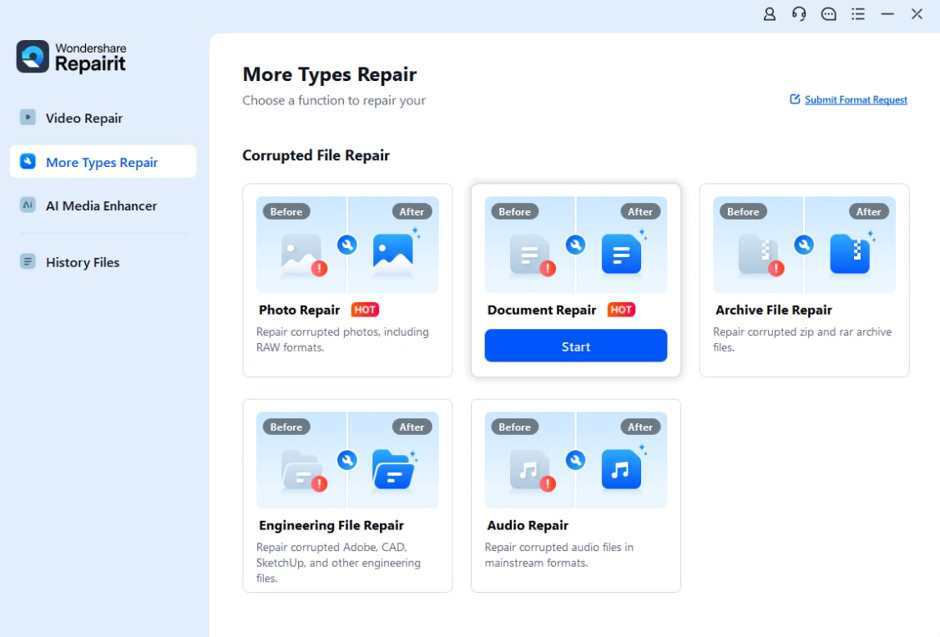
Step 2: Let Repairit analyze the file
Open the repair workflow and add the damaged copy. The tool inspects the file structure for you, which is useful when the document still exists but behaves as if it were broken. The goal is to get back a readable version without guessing at the internal format.
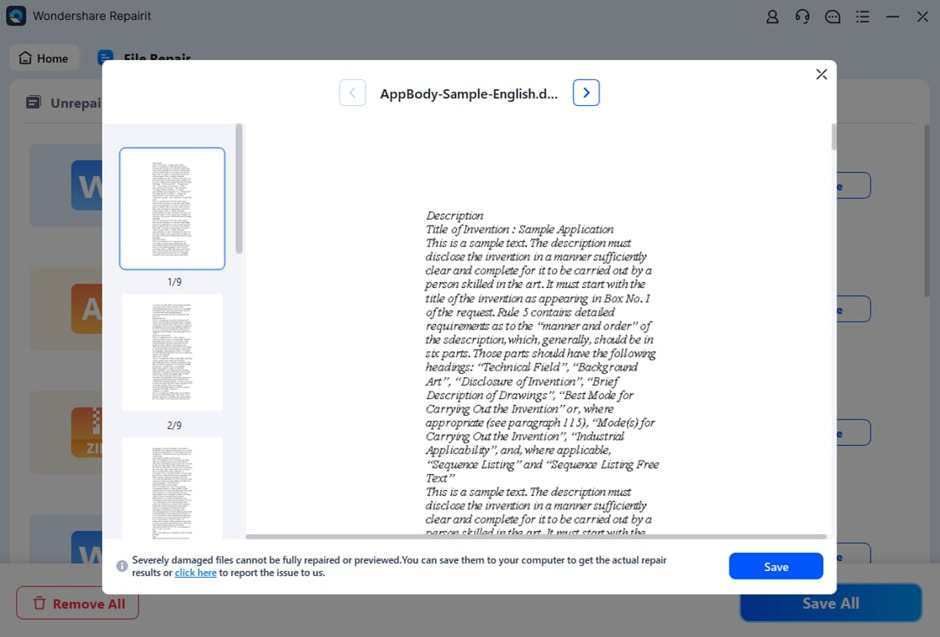
Step 3: Preview and save the repaired result
Review the output carefully before replacing the working copy. Check text, layout, tables, and any embedded content. If the file opens normally and the important parts are still intact, save it as a new clean copy and keep the source archive unchanged.
Desktop vs Online File Repair
The right choice depends on urgency and file complexity. Online repair is good for a quick first check, while desktop repair is better when the file matters enough to justify a more controlled recovery process. The difference is less about technology and more about risk: smaller, simpler files can move fast, but larger working files deserve more care.
Online repair fits smaller files and short decision cycles. Desktop repair fits large, important, or repeatedly edited files because it gives you more control over the recovery workflow and keeps the local copy in your hands.
For teams, the practical rule is simple: use the browser path for speed, and use the desktop path when the file is too valuable to treat lightly.
Choose online restoration when the photo still has readable detail
| Use case | Desktop repair | Repairit Online |
|---|---|---|
| Large thesis, client project, or business file | Better for heavier files, deeper preview, and local control | Less ideal if the file is large or needs more review |
| Need a fast browser check before a deadline | Works well, but requires desktop setup | Best fit for quick checks and short recovery cycles |
| Shared campus or office computer | May need permission, install time, or local storage | Convenient when software installation is restricted |
Conclusion
A corrupted file does not always mean the work is gone. The safer approach is to protect the original, repair a copy, and confirm the result before you replace anything in circulation.
gives that process a practical starting point when the file matters more than the time you would spend rebuilding it.
The practical goal is simple: do not wait for a meaningful image to become unusable before treating it as worth preserving. If the memory still matters, the photo deserves a chance to be saved.