When I first tried to sign PDF on iPhone, I expected the whole process to be easy and completely free of hassle for everyday tasks. After a few attempts, I realized the built-in markup tool only offered basic handwriting, which looked different every time. I soon noticed how inconvenient this became whenever I needed a repeatable signature for forms, agreements, or important submissions.
Things became even more limiting when I discovered that the default tools do not support any type of secure or officially verifiable signing method. I needed a more reliable way to handle all my document signing needs. Moreover, I need to store my signatures, reuse them, sync everything through the cloud, and complete the signing process. After continuous attempts, I finally found a suitable solution.

Part 1. Challenges of Signing Documents on iPhone and Mac
In my daily workflow, I get documents that require a signature within a short time, like agreements, HR documents, and freelance contracts. Many of these arrive when I am away from my Mac, so I need to sign a document on iPhone right away. The Markup tool in the Files app lets me draw a signature with my finger, but the results never look consistent or professional.
The bigger issue appears when a document requires a verifiable certificate because the built-in tools on iPhone and Mac cannot create a digital signature at all.
Alternative Solution For Signing Documents on iPhone and Mac
Before I settled on any tool, I kept running into small issues whenever I had to sign PDFs. Sometimes the signature didn’t sync across devices, and occasionally the app couldn’t handle proper digital signatures at all.
For digital signatures and handwritten signatures, I think there is a tool that is very good after my trial, and that is UPDF. I used it for signing PDFs because it lets me create secure digital signatures, type or import signatures, and save them for future use. Everything syncs across iPhone and Mac, so I no longer redraw my signature repeatedly or worry about documents requiring verifiable certificates. Moreover, UPDF provides a complete PDF editing experience, allowing me to modify text, adjust fonts, and annotate documents.
Key Advantages
- Saving my handwritten, typed, or image signatures in UPDF Cloud means I never have to redraw anything repeatedly.
- Password-protected digital signatures are easy to create or import, which gives me verified certification whenever documents require official approval.
- Every signature looks exactly how I want because UPDF lets me adjust style, direction, elements, and preset naming effortlessly.
Part 2. How to Sign PDFs on iPhone and Mac?
Once UPDF became my go-to solution to sign PDF on iPhone and Mac, you might be thinking about how this tool works. Next, I’ll share step-by-step guides on signing a document on both devices. This way, you can easily complete your document and avoid the frustration of inconsistent signatures.
Signing PDFs on iPhone With UPDF
Now, follow the steps below to see how to sign your PDF files on an iPhone using UPDF:
Step 1. Import Your PDF to UPDF
Once you open the UPDF, tap on the “+” icon and use the “Files” option to import your PDF where you need the signature.
Step 2. Access The Signature Tool
After importing the PDF, use the “Fill & Sign” option from the bar below and hit the “Signature” option to access the tool.
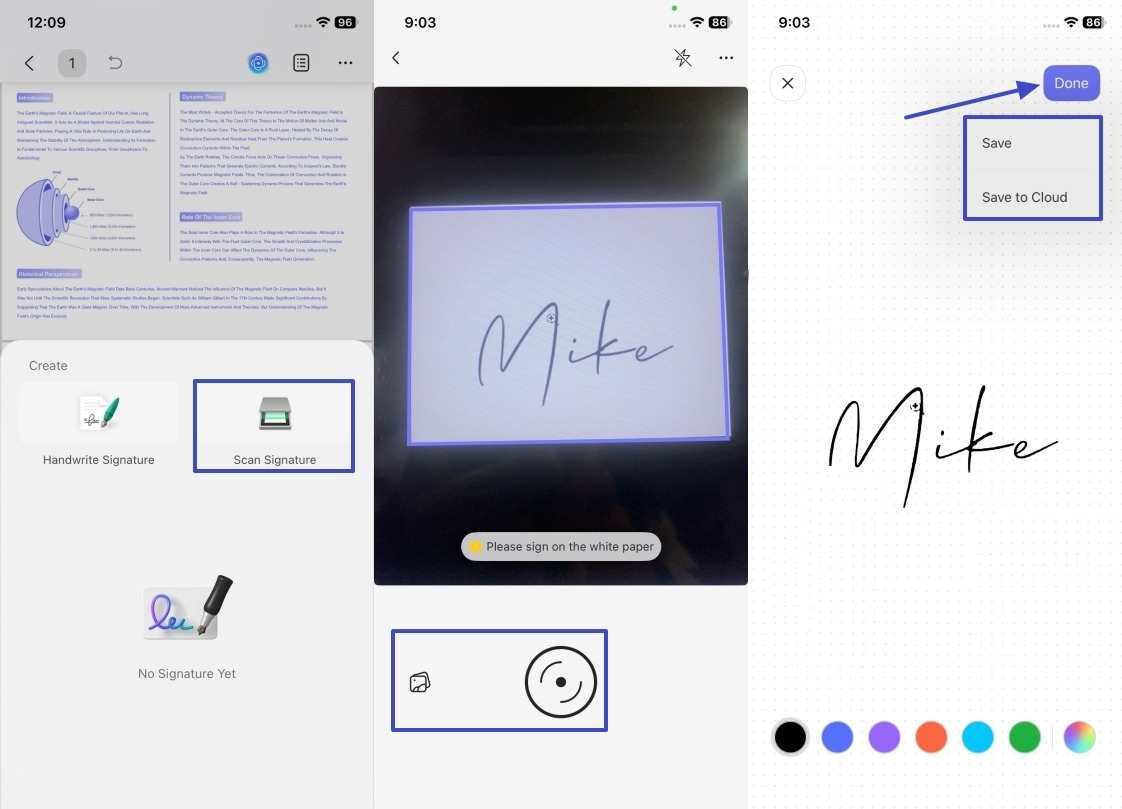
Step 3. Handwrite The Signature
Next, tap on the “Handwrite Signature” option and draw your signature on the screen. Also choose the color of the signature to customize it. After that, hit the “Done” option to save the signature for future use.
Step 4. Use Image-Based Signature
To extract a signature from an image or a paper, use the “Scan Signature” option and tap on the “Gallery” or “Capture” option to import. Next, hit the “Save” or “Save to Cloud” to save the signature.
Signing PDFs on Mac With UPDF
After learning how to sign a document on iPhone, now we’ll see how I create and use handwritten and digital signatures on a Mac.
How to Create an Electronic/Handwritten Signature on a Mac
Now, follow the steps below to learn how to generate an electronic signature on a Mac:
Step 1. Open PDF File and Access Signature Tool
Once you import your PDF, hit the “Tools” option at the top and press the “Comment” option under the “Mode” section. Next, choose the “Signature” option and hit the “Create Signature” button to create a new signature.
Step 2. Create Your Signature
After that, hit the “Keyboard” tab and type your name for the signature. Choose the color and style of your signature for customization and hit the “Create” option to generate it. You can also handwrite or import your signature from an image using the “Mouse,” “Trackpad,” or “Photo” options.
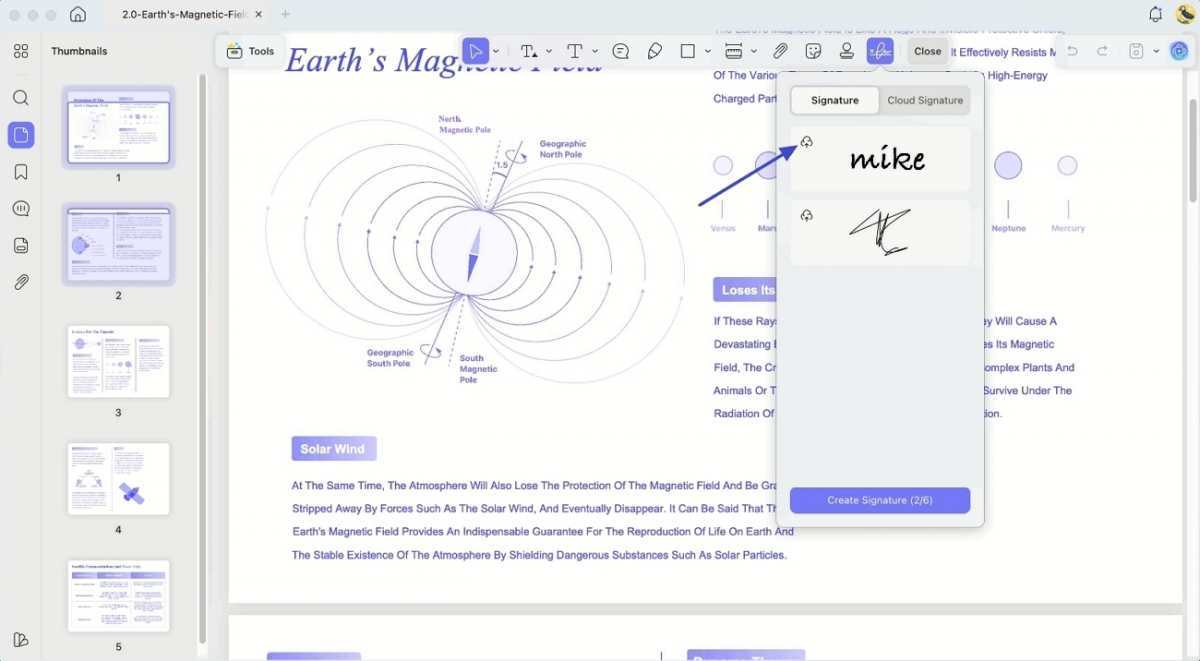
Step 3. Save Signature in Cloud
Next, hit the “Signature” option again and press the “Save to Cloud” icon beside your signature to save it in the cloud for future use.
How to Create a Digital Signature on a Mac
Once you have learned about handwritten signatures, follow the steps to create a digital signature Mac:
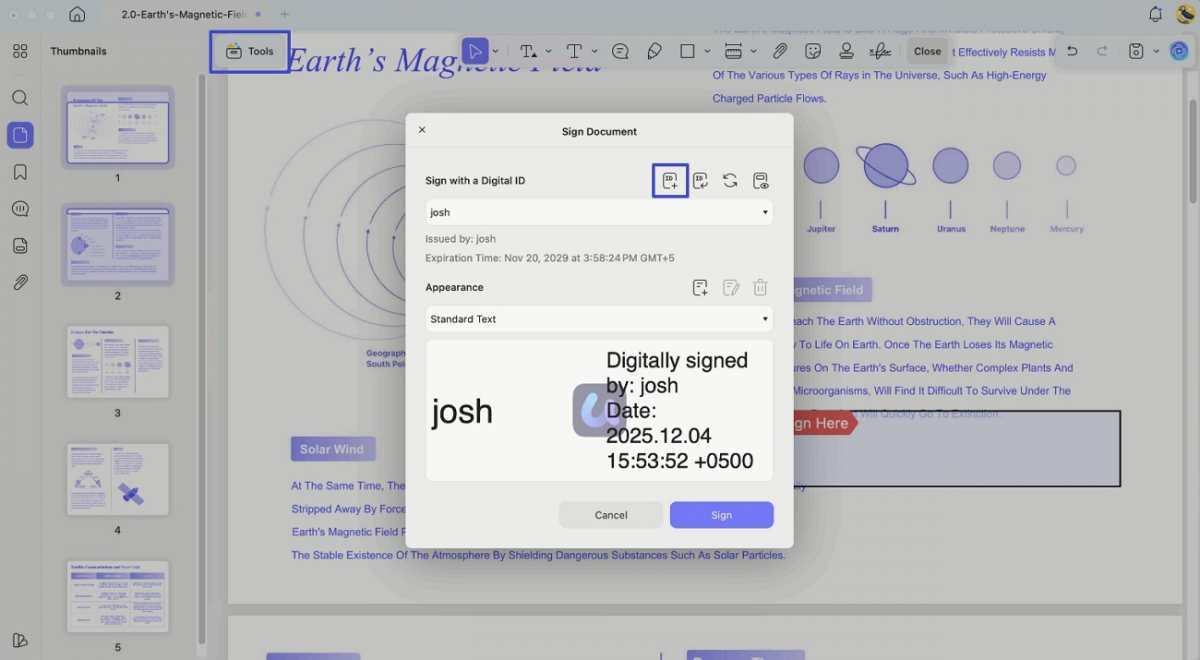
Step 1. Create a Digital Signature Field
After opening the PDF, hit the “Tools” option and press the “Forms” option. Next, hit the “Digital Signature” icon and click anywhere on the screen to create the field.
Step 2. Generate New Digital ID
Hit the “Comment” option in the “Tools” section and click the field to view a pop-up window. Next, press the “Create” icon to move forward.
Step 3. Enter Your Name and Email
Enter your name and email in the designated fields and hit the “Create” button. After that, add a new password to create digital signatures.
Tip: Create a Digital Field on UPDF Desktop and Sign on iPhone
If I added a digital signature field on UPDF Desktop and save the file, anyone opening it on an iPhone can sign digitally. Go through the steps below to learn how to digitally sign a document on iPhone after setting up the signature field on your desktop.
Step 1. Save Digital Signature Field
Once you create a digital signature field, hit the “Arrow” icon with the “Save” option.
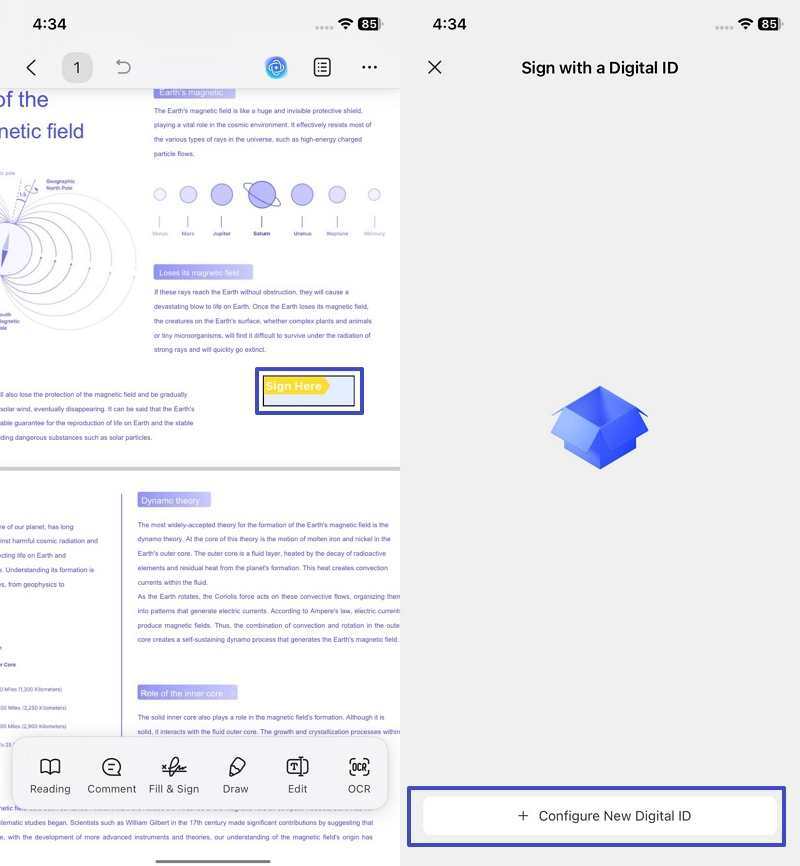
Step 2. Create a Digital Signature on iPhone
After accessing the PDF on an iPhone, tap on the digital signature field and hit the “Configure a New Digital ID” option.
Step 3. Enter Name and Email
Next, enter your name and email and use the “OK” option to create a new digital ID. Hit the digital signature field again and tap on the “Sign” option to place your new digital signature.
Conclusion
In this article, I showed how to sign PDF on iPhone and Mac, covering both handwritten and digital signatures. The built-in tools in Apple devices are limited and inconsistent, but you can create, save, and reuse signatures using the following methods. For anyone who needs a reliable way to sign documents, you can try the way I introduced above.